Stray dog relocation: essential pre-trip checklist
Most transport disasters are paperwork disasters in disguise. The dog gets into the crate fine.
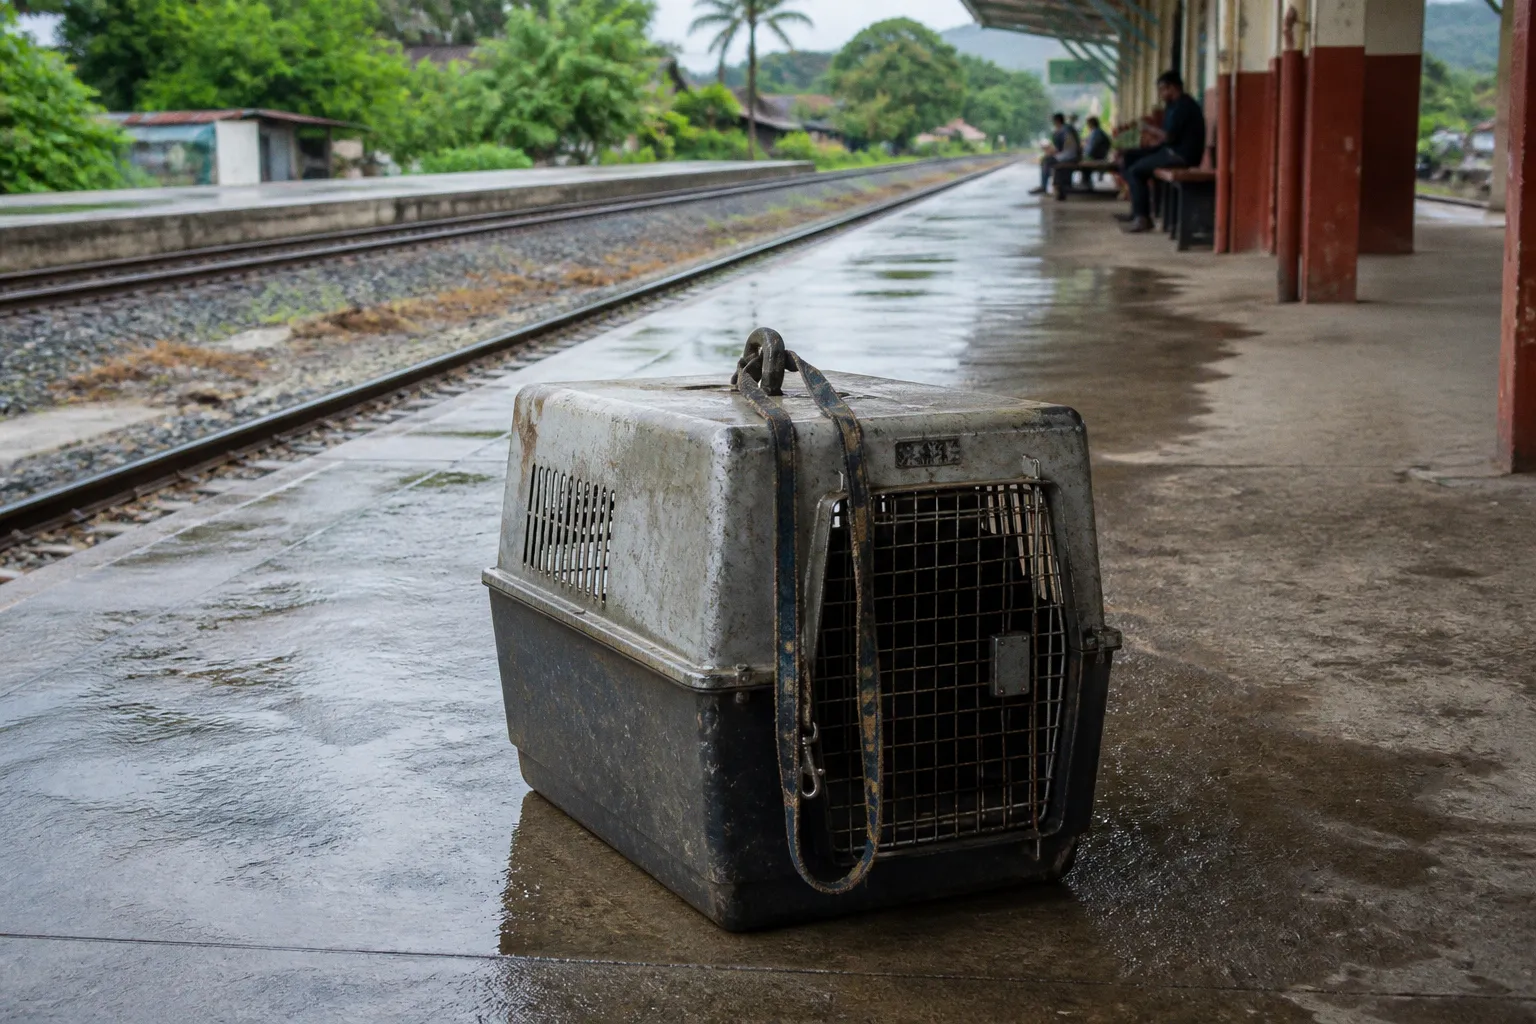
It is the health certificate that was not signed, the rabies record that does not match the microchip, or the harness that only looked sturdy in the shelter parking lot. By the time the engine turns over, the failure has already been built in — usually at a desk, not in a kennel.
This is the part of rescue nobody posts about. The shareable version skips straight from finding a stray to arriving safely in foster care. The middle — the veterinary clearance window, the crate-sizing math, the route plan nobody wants to fill out twice — is where transports actually go sideways. Treat this checklist like the preparation sheet it is: deliberately boring, detailed enough to prevent improvisation, and built around one simple goal: getting the dog to the receiving organization safely and with its records intact.
Relocating a rescue dog is not the same as putting a familiar pet in the car for a weekend. A stray may have an unknown medical history, no reliable response to handling, and no established tolerance for confinement, traffic, unfamiliar people, or other animals. The safest plan assumes that information is incomplete. It does not assume the dog will remain calm because the dog was friendly during intake.
Veterinary readiness: start sooner than you think
The single biggest mistake in rescue logistics is treating the veterinary visit as a last-minute checkbox. For a domestic relocation, three to four weeks of lead time is a practical minimum when the dog’s condition and destination requirements are not yet known. Long-haul or cross-border work may require substantially more time. Health certificates, laboratory work, vaccinations, parasite treatment, and destination-specific approvals do not always move on the same schedule.
Anything inside that window may still be possible, but it leaves less room for a sick dog, a delayed laboratory result, a missing signature, or a receiving organization that follows stricter intake rules than the transport coordinator expected.
Before the dog boards a vehicle, arrange a documented health examination and clearance from a licensed veterinarian. That appointment should address more than temperature and a rabies sticker. At a minimum, the transport file should make clear:
- Whether the dog is clinically fit to travel and whether any symptoms require postponement.
- Which vaccinations have been given, when they were administered, and which remain due.
- Whether rabies vaccination is current and supported by the required certificate.
- Whether a microchip is present, readable, and recorded with the correct identification number.
- Whether the dog needs testing, deworming, parasite control, or follow-up treatment before entering a foster home or shelter population.
- Whether the dog has restrictions that affect the journey, such as medication schedules, recent surgery, respiratory problems, pregnancy, injuries, or poor heat tolerance.
- Whether the receiving state, organization, or country requires a Certificate of Veterinary Inspection or another form of health documentation.
A Certificate of Veterinary Inspection is not a universal document with one universal validity period. Requirements vary by destination and by the type of movement involved. Some jurisdictions accept certificates issued within a defined period before arrival; others require additional vaccination, testing, import authorization, or specific wording from the veterinarian. Confirm the requirements with the destination authority and receiving organization before scheduling the appointment. A certificate issued too early, signed on the wrong form, or missing a required detail can be functionally useless at the intake desk.
Microchip confirmation deserves the same level of attention. Do not rely on a shelter note that says the dog is chipped. Have the chip scanned, record the number, and compare it against the intake record, medical file, crate card, and transfer paperwork. If the chip is registered to a previous owner or another organization, establish how the receiving rescue will handle the registration. The chip is an identification tool, not proof of current legal ownership, so the transfer record still matters.
Vaccination decisions should also reflect the destination environment. A dog entering a single-dog foster home may face a different exposure profile from a dog moving directly into a busy shelter, boarding facility, transport hub, or multi-dog foster. Core vaccines, rabies documentation, and any additional vaccination required by the receiving organization should be discussed with the veterinarian. Bordetella may be required or strongly recommended for dogs entering communal settings, but it should not be treated as a substitute for a broader health assessment.
A stray with diarrhea, coughing, nasal discharge, fever, unexplained lethargy, open wounds, or a recent positive disease test should not be moved simply because the vehicle and destination are ready. The transport coordinator needs a clear veterinary decision about whether the dog can travel, under what precautions, and whether the destination has the capacity to isolate or treat the dog. Sometimes the correct relocation plan is a delay, a different vehicle, or transfer to a medical foster rather than a standard shelter intake.
If the dog is intact, reproductive status should be part of the planning conversation. Spay or neuter may be appropriate before relocation, but timing depends on age, health, recovery needs, and the veterinarian’s assessment. A dog should not be rushed into surgery solely to meet a departure date if recovery would make the journey less safe. Equally, the receiving organization needs to know whether surgery is pending and who is responsible for arranging it.
Rescue transport is mostly waiting for a veterinarian to send something back, with some driving mixed in. Plan accordingly.
Essential transport gear and secure containment standards
A crate is not a suggestion. It is the difference between a controlled relocation and a loose dog on a highway. Each transported dog should have an individual containment plan based on size, physical condition, temperament, escape behavior, and the vehicle being used.
A properly sized crate allows the dog to stand, turn around, and lie down without being forced into an awkward position. It should provide adequate ventilation, have a door that latches securely, and be free of cracked panels, sharp edges, damaged hinges, or unreliable fasteners. Oversizing is not always safer: in a moving vehicle, excessive unused space can allow a dog to be thrown against the walls during sudden braking. Undersizing creates its own welfare problem, especially on long legs.
Crates must be secured inside the vehicle so they cannot slide, tip, or shift into another crate. A crate that looks stable while parked may move dramatically during a turn or emergency stop. Use the vehicle’s available anchor points and follow the crate manufacturer’s guidance. Do not stack crates in a way that blocks ventilation, obstructs emergency access, or places unstable weight above a dog.
Soft-sided carriers may be suitable for small, calm dogs under controlled conditions, but they are a poor default for an animal with an unknown history. A dog that panics, chews, claws, or pushes against a flexible wall can escape from a carrier that appeared adequate during a short test. For larger dogs, escape-prone dogs, and dogs whose behavior has not been assessed, a robust hard-sided crate or a professionally appropriate heavy-duty containment system is usually the more defensible choice.
The harness question matters too. A well-fitting, crash-tested harness attached to an approved vehicle restraint system may be appropriate for a crate-trained dog traveling in a passenger vehicle, provided the dog cannot back out of it and the system is suitable for that vehicle and dog. A collar clipped directly to a seatbelt loop is not an adequate substitute for a tested restraint. In a hard stop, it can create a serious neck injury or fail altogether.
During loading and unloading, containment should be layered rather than dependent on one piece of equipment. A slip lead must be used whenever the dog is loaded into or unloaded from the transport vehicle, unless a veterinarian or qualified behavior professional has specifically identified a safer alternative for that dog. The lead should be fitted before the crate or kennel door opens and remain in use throughout the movement into or out of the vehicle.
For a fearful, reactive, or escape-prone dog, the team may also need a second lead, a properly fitted collar, a secure transfer space, and a clear agreement about who handles the dog and who opens doors. A slip lead is not permission to drag a frightened animal. It is a control point that gives the handler a chance to respond if the dog backs away, slips a collar, or bolts toward an open gate.
Two rules are worth treating as non-negotiable:
- Use a slip lead for every loading and unloading movement. If a veterinarian or qualified behavior professional has specified a safer alternative for an individual dog, document that decision and brief the entire transport team before departure.
- Every dog must wear an identification tag on its collar, and every crate must have an identification card. The information should match the dog’s records and remain legible if the crate is moved, cleaned, or transferred between vehicles.
The gear that should travel with every relocation depends on the route and the number of dogs, but a sensible stray dog rescue gear list includes:
- Spare slip leads, because one will eventually fail, disappear, or become contaminated.
- Backup collars in appropriate sizes, with room for adjustment.
- An identification tag for every dog, plus spare tags and a method for replacing one if it is lost.
- Spare crates or dividers when the route is long and reconfiguration may be necessary.
- Water bowls that attach securely to the crate door or wall rather than open containers that can spill during movement.
- Absorbent bedding, washable pads, and sealed bags for soiled materials.
- Food in labeled portions, even if the feeding plan is to delay a full meal.
- Any prescribed medication, with written dosing instructions and the responsible person’s name.
- A basic first-aid kit containing gauze, saline, gloves, and styptic powder.
- Cleaning supplies that can be used without exposing the dogs to harsh fumes in an enclosed vehicle.
- Flashlights, spare batteries, phone chargers, and a paper copy of the route plan.
Do not put loose objects inside a crate with a dog unless they are specifically designed for that use. Bowls, toys, and bedding can become hazards when they slide, break, or are chewed. Bedding should be thick enough to absorb moisture but not so loose that it obstructs the door or ventilation.
If the restraint setup relies on the dog behaving, it is not a restraint setup.
Managing documentation and identification for rescue transit
The folder in the front seat is not bureaucratic overhead. It is the operational record for the move. Transport paperwork can document the dog’s health clearance, identification, vaccination history, and transfer details. It does not prove that the dog is not stolen, guarantee that the dog carries no infectious disease, or ensure that a destination shelter will accept the dog under every circumstance. Those questions require the appropriate ownership records, veterinary assessment, disease-control procedures, and prior confirmation from the receiving organization.
The documentation should be complete enough for someone who was not involved in the original intake to understand who the dog is, where it came from, what care it has received, and where it is going.
| Document | Purpose |
|---|---|
| Certificate of Veterinary Inspection, when required | Records the veterinarian’s health assessment and clearance within the applicable travel window |
| Rabies certificate and vaccination records | Documents vaccination status and supports destination requirements |
| Microchip record and scan result | Connects the dog to a unique identifier and helps prevent mix-ups |
| Intake and medical records | Provides available history, treatments, test results, and observations from the originating organization |
| Transfer or custody documentation | Records the organizations or individuals responsible for the dog at each stage |
| Transport run sheet | Shows each dog’s name or assigned ID, microchip number, crate position, destination, and contact person |
| Emergency contact sheet | Lists the origin veterinarian, destination veterinarian, transport coordinator, and receiving organization |
| Medication instructions | Specifies dose, timing, storage, and the person responsible for administration |
A document can be present and still be wrong. Check names, microchip numbers, dates, and destination details against one another. A dog’s kennel name may differ from the name on the veterinary record, but the identifying information must make the connection clear. If the dog has no confirmed name, use a consistent temporary ID across the collar tag, crate card, run sheet, medical file, and transfer record.
Every dog should wear its identification tag on its collar before it is moved toward the vehicle. The tag should show the agreed identifying information and, where appropriate, a contact number for the organization responsible for the transport. Do not treat the crate card as a replacement for the collar tag. The crate can be opened, exchanged, cleaned, or separated from the dog; the collar tag travels with the dog.
The printed run sheet and essential transport documents must remain in a waterproof sleeve during transit. That sleeve should be closed securely and stored where the driver or designated transport lead can reach it without unloading equipment. A second set may be carried separately, but a digital copy is not a substitute when the transport plan requires printed documents. Digital records can still be useful as backup and should be saved for offline access in case the route passes through an area with poor service.
The run sheet deserves more attention than it usually gets. It should list every dog on the vehicle, the crate location, the planned destination, the receiving contact, and any immediate medical or handling note that the transport team needs to know. It should also record departures, transfers, rest stops, incidents, medication administration, and final handoff. The printed run sheet should remain in the waterproof sleeve throughout the journey, including at fuel stops and vehicle changes.
The purpose is not to create paperwork for its own sake. It is to prevent a tired volunteer from making a preventable mistake at a late-night fuel stop, a crowded transfer point, or a destination where several dogs arrive at once. If a crate is moved, a dog is transferred to another vehicle, or a medication is given, the record should be updated immediately rather than reconstructed from memory.
Before departure, confirm the receiving organization’s intake conditions in writing. Ask about arrival hours, after-hours procedures, isolation capacity, required records, and who is authorized to accept the dog. A verbal assumption that someone will be available is not a handoff plan.
Safety protocols for loading, unloading, and rest stops
Loading is where a routine transport can become a bite incident or an escape. The dog is stressed, the kennel area is loud, the volunteer is trying to move quickly, and someone decides to skip the lead because the dog was calm during intake. That shortcut is especially dangerous with a stray whose behavior may change outside the shelter or away from familiar handlers.
Use the same sequence every time:
1. Prepare the vehicle and crate before bringing the dog over. The door should be open, the bedding placed, the crate secured, and the route from kennel to vehicle as short and controlled as possible.
2. Put the slip lead on before the crate or kennel door opens. The slip lead must stay on for the entire movement into the vehicle. Confirm that it is secure without creating unnecessary pressure around the neck.
3. Assign one person to handle the dog and one person to manage doors, gates, and equipment. Do not let several people reach for the dog at once.
4. Move directly into the crate or designated containment area. Avoid unnecessary stops, greetings, and opportunities to pull away.
5. Close and latch the door, then test it. Pull the door firmly and verify that the latch holds. Repeat this check for every crate.
6. Secure the crate to the vehicle and confirm that ventilation remains clear before the vehicle moves.
If the dog refuses to enter, do not turn the loading area into a contest. Give the handler space, reduce noise, and reassess the equipment and approach. A trained team may use food or a familiar scent to encourage movement, but nobody should reach blindly into a frightened dog’s space or create pressure that triggers a bite or a scramble.
If the planned equipment is not working, stop and change the plan. A loose collar, damaged crate, crowded doorway, or missing second handler is a transport problem, not an inconvenience to be worked around. The safest response may be to delay loading, move the vehicle to a quieter location, use a secure transfer area, or seek help from someone experienced with fearful dogs.
Unloading requires the same discipline as loading, and often more. A dog that has been quiet for hours may surge toward an open door after confinement, noise, thirst, or accumulated stress. Before opening the crate, confirm that the destination gate, building entrance, and any interior doors are closed. Put the slip lead on while the dog is still secured, and keep it in use until the dog is inside the designated containment area. The collar identification tag should remain on the dog during the entire transfer.
Rest stops should be planned rather than improvised. Choose locations where the vehicle can be parked away from heavy pedestrian traffic and where the team can create a controlled buffer around the dogs. Never open a crate in a public parking lot simply because the dog appears restless. If a dog needs a bathroom break, use a secure area, keep the slip lead on for the full movement, and have one person watching doors, gates, and surrounding traffic.
Most dogs should not be removed from their crates at every stop. Opening a crate creates an escape opportunity and may expose the dog to unnecessary contact with unfamiliar people, animals, or contaminated surfaces. The transport team should assess the dog’s condition, route length, weather, medication schedule, and veterinary instructions. Some dogs may need a controlled break; others are safer remaining secured with access to water and clean bedding.
At each stop, check:
- Breathing, alertness, posture, and signs of distress.
- Water availability and whether the bowl has spilled.
- Bedding condition and whether urine, feces, or vomit requires a change.
- Crate latches, anchor points, collar fit, and the presence of the ID tag.
- Vehicle temperature, airflow, and ventilation around every crate.
- Whether any medication is due and whether it has been recorded on the run sheet.
- Whether doors, windows, and external gates are secure before any crate is opened.
Do not leave dogs unattended in a parked vehicle when temperature or ventilation may become unsafe. Air conditioning can fail, a vehicle can be delayed, and a quick stop can become longer than expected. The transport plan should identify who stays with the dogs and what happens if the vehicle develops a mechanical problem.
The driver should also know which behaviors require stopping the journey and calling for advice. Persistent vomiting, labored breathing, collapse, severe diarrhea, abnormal gum color, uncontrolled bleeding, a seizure, or rapidly worsening weakness are not routine transport discomforts. Follow the veterinarian’s instructions, contact the designated emergency veterinary service, and notify the receiving organization. A schedule is never more important than a medical emergency.
Sanitation standards to prevent cross-contamination
A rescue vehicle can move several dogs safely and still become a disease-transfer system if the team treats cleaning as an afterthought. Unknown vaccination status, recent shelter exposure, diarrhea, respiratory signs, parasites, and contaminated bedding make cross-contamination a practical concern on every multi-dog transport.
Separate clean supplies from used materials before the vehicle leaves. Food, medication, spare bedding, leads, and paperwork should not share an open area with soiled pads, waste bags, used gloves, or cleaning cloths. Keep waste in sealed bags and remove it at an appropriate disposal point. Do not place wet or contaminated items back into a supply bin for later sorting.
Clean and disinfect surfaces according to the product label and the veterinarian’s or organization’s disease-control protocol. Disinfectant needs the correct concentration and contact time; spraying and immediately wiping a surface may not be enough. Visible dirt and organic material can reduce the effectiveness of some products, so remove debris first. Never mix cleaning chemicals, and allow treated surfaces to dry or be ventilated as directed before dogs are exposed to them.
Ideally, each dog has dedicated bowls, bedding, and handling equipment for the journey. If equipment must be shared, clean and disinfect it between dogs, with particular attention to leads, collars, crate doors, water containers, and any surface touched by hands or mouths. A dog with suspected infectious illness should not share equipment with healthy dogs unless the veterinary team has approved the procedure.
The order of handling matters. When several dogs have different health concerns, handle the healthiest or lowest-risk dogs first and animals with suspected illness last, unless the veterinary protocol specifies another sequence. Change gloves between dogs when contamination is possible, and wash hands when gloves are removed. Gloves are not a substitute for hand hygiene: touching a phone, door handle, clipboard, or another dog with contaminated gloves simply moves the problem elsewhere.
A practical transport sanitation kit includes:
- Disposable gloves in more than one size.
- Hand sanitizer and access to soap and water when available.
- Absorbent pads and extra washable bedding.
- Sealable bags for waste, laundry, and contaminated equipment.
- Paper towels or washable cleaning cloths.
- A labeled disinfectant suitable for the vehicle and animal-contact surfaces.
- A separate container for clean supplies and another for used materials.
- Replacement collar tags or identification materials if a tag becomes unreadable.
- A written note of any dog requiring isolation or special disease-control handling.
Do not use strong fragrances, aerosol products, or harsh fumes around confined dogs. A vehicle that smells clean to people may be irritating to a dog’s respiratory system, especially after a stressful journey. Ventilate the area and follow the product instructions rather than trying to cover odors with another chemical.
Sanitation continues at handoff. The receiving organization should know whether the dog has had diarrhea, coughing, vomiting, parasite treatment, a positive test, or contact with a dog showing signs of illness during the journey. Concealing a problem to avoid an intake delay puts the receiving population at risk and makes treatment more difficult. Accurate notes on the run sheet and medical record give the next team a chance to isolate, examine, and care for the dog appropriately.
The final pre-departure review
A good stray dog relocation checklist ends at the vehicle, but it starts well before the driver arrives. The coordinator should be able to answer a few basic questions without searching through messages:
- Has a veterinarian cleared the dog for travel?
- Are the health certificate, rabies record, vaccination records, and other required documents complete and within the destination’s accepted window?
- Has the microchip been scanned and matched to the records?
- Is the dog wearing its identification tag on its collar?
- Does the crate have a matching identification card?
- Is the printed run sheet complete and protected in a waterproof sleeve?
- Are all essential transport documents in a waterproof sleeve and accessible during transit?
- Is the crate appropriate, intact, ventilated, and secured to the vehicle?
- Is a slip lead ready for every loading and unloading movement?
- Does the team know who handles the dog, who controls doors, and who records each transfer?
- Are the route, rest stops, emergency contacts, medication times, and receiving hours confirmed?
- Is there a sanitation plan for waste, dirty bedding, shared equipment, and dogs with possible illness?
Do this review while there is still time to fix something. Finding a missing tag in the shelter parking lot is inconvenient. Finding a missing certificate at a state line, an unregistered microchip at intake, or a damaged crate after the vehicle has left is much harder to recover from.
Relocation is successful when the dog arrives not merely alive, but identifiable, medically documented, contained, and ready for the next stage of care. That outcome is rarely the result of one heroic decision on the road. It comes from a series of unglamorous decisions made before departure: the right veterinary window, the right crate, the right lead, the tag on the collar, the run sheet in its waterproof sleeve, and a team willing to stop when the plan no longer matches the dog in front of them.
For rescue transport, preparation is not administrative polish. It is part of the animal’s safety equipment.