Shelter dog transport: a volunteer driver roadmap
Shelter dog transport fails at predictable points: an unsecured dog exits during loading, an unvaccinated puppy touches a public surface, a crate carries pathogens from one relay to the next, or a…
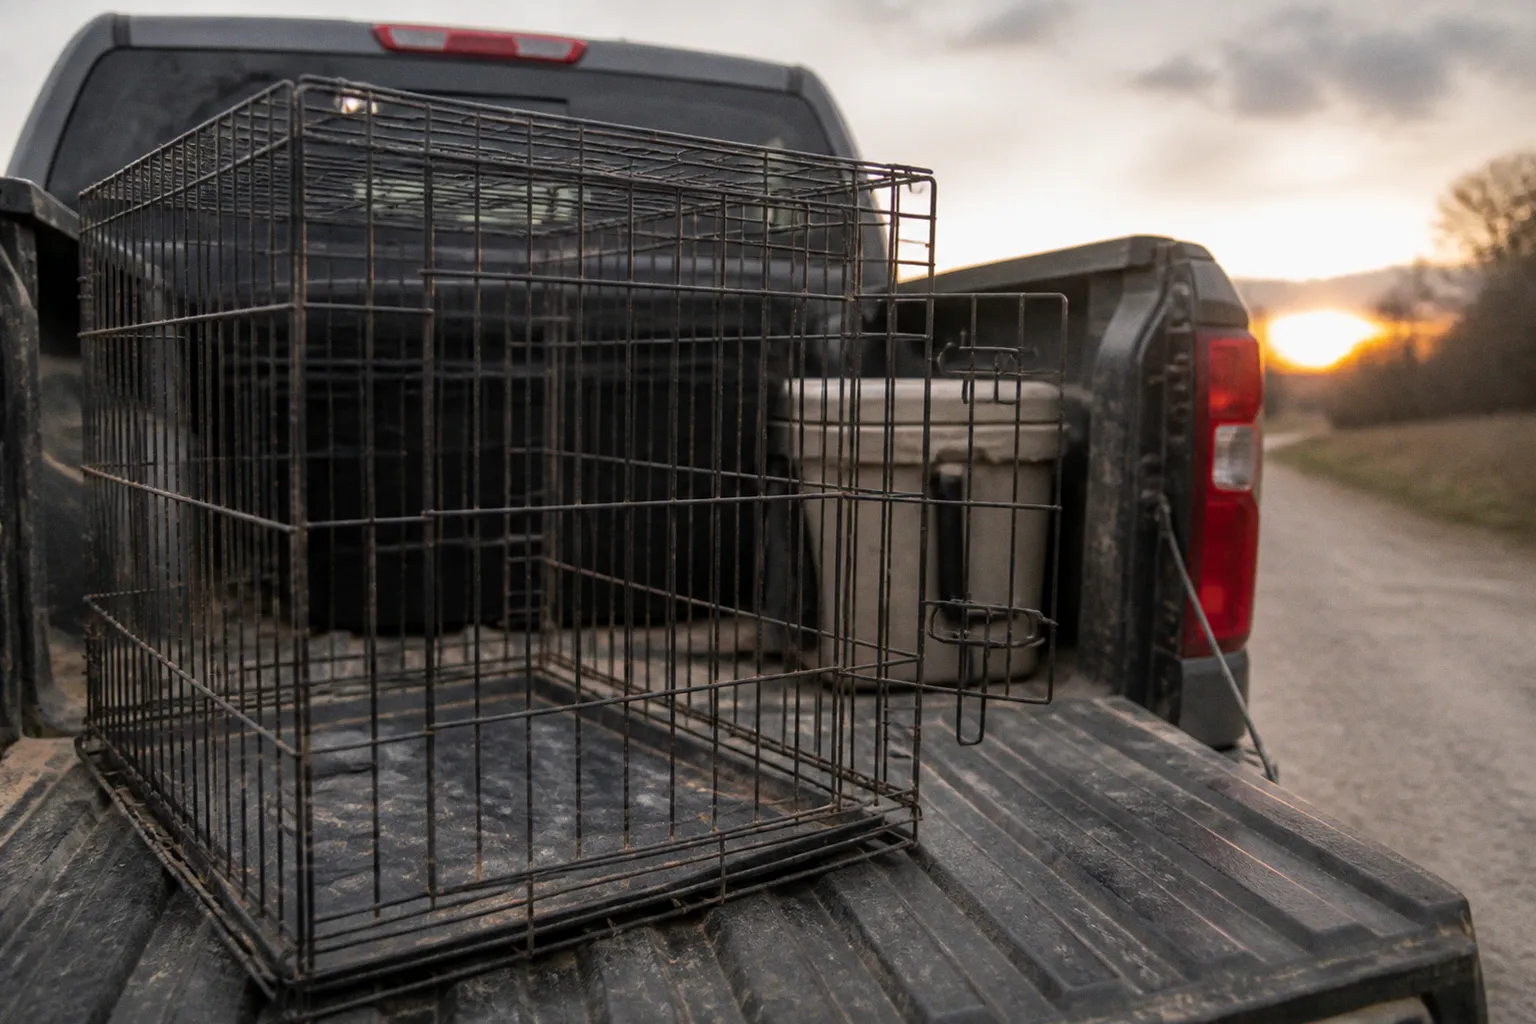
Shelter dog transport fails at predictable points: an unsecured dog exits during loading, an unvaccinated puppy touches a public surface, a crate carries pathogens from one relay to the next, or a paperwork gap leaves the receiving team without a verified animal record.
The fix is procedural. A volunteer driver needs a prepared vehicle, redundant restraint, controlled transfer points, documented handoffs, and a communication chain that does not depend on memory. This shelter dog transport volunteer driver checklist covers the operational sequence from vehicle setup to final arrival.
Vehicle preparation and infection control standards
Transport begins before the dog enters the vehicle. The vehicle must support containment, cleaning, temperature control, and visual monitoring. Passenger comfort is secondary to animal security and infection control.
Configure the vehicle for containment
Use a crate sized for the individual dog. The dog should be able to stand, turn, and lie down without excessive unused space that permits uncontrolled movement during braking or cornering. Secure the crate so it cannot slide, rotate, or tip.
A crate pan should be installed before departure. Use bedding that can be removed quickly if contaminated. Keep cleaning supplies in a separate, sealed container. Do not place disinfectants where the dog can reach them.
The load distribution matters. A heavy crate positioned high or unsecured changes the vehicle’s kinetic behavior during sudden braking. Keep the crate low, stable, and isolated from loose equipment. Do not rely on a seat belt passed around a crate unless the crate manufacturer and rescue organization approve that configuration. The restraint system must prevent movement, not merely reduce it.
The driver’s sightline and access to the dog also matter. A crate blocked by bags or stacked equipment cannot be monitored or reached efficiently during an emergency. Leave a clear route to the crate door.
A practical setup includes:
- A secured crate with a clean crate pan.
- Washable bedding and spare bedding.
- Water container and a method for offering water without creating a spill hazard.
- Waste bags, absorbent material, disposable gloves, and cleaning cloths.
- Veterinary-grade disinfectant or a pathogen-killing solution.
- Spare leash, harness, and slip lead.
- Physical or digital transport paperwork.
- Phone charger and access to the assigned transport group chat.
- Flashlight for low-light loading and transfer points.
- Separate bags for clean and contaminated equipment.
Do not transport a rescue dog loose in the passenger compartment. An open window is not a restraint system. A loose animal can interfere with steering, escape during a door opening, or suffer injury during a collision.
Separate clean and contaminated equipment
Infection control is a transport requirement, not a shelter-only responsibility. Dogs may be incubating contagious disease without obvious clinical signs. Crates, crate pans, bedding, and vehicle surfaces can transmit pathogens between animals.
After every transport, remove bedding and organic material first. Disinfection is less reliable when feces, urine, saliva, or dirt remains on the surface. Clean the crate pan and all contact surfaces before the next animal is loaded.
Use a pathogen-killing solution such as a 10% bleach dilution or a specialized rescue disinfectant such as Trifectant or Rescue. Follow the product label for dilution, surface compatibility, and required contact time. Do not mix cleaning chemicals.
Pay particular attention to:
- Crate bars, latches, handles, and door frames.
- Crate pans and the area beneath the crate.
- Leashes, slip leads, and harnesses.
- Door sills and cargo-area flooring.
- Water bowls and any surface touched by the dog.
- Shoes and gloves used during loading and unloading.
A transport vehicle is part of the disease-control system. If the vehicle cannot be cleaned between dogs, the transport plan is incomplete.
Keep personal pets out of the transport vehicle unless the rescue organization has approved the arrangement and the animals can remain completely separated at all times in a secure setup. Separation must include containment and contact control. A brief shared walk or casual nose-to-nose contact defeats the purpose.
Control thermal conditions
Thermal regulation is a vehicle-management problem. A dog confined in a stationary vehicle can overheat rapidly, while a stressed or wet dog can become dangerously cold. Do not leave the dog unattended in a parked vehicle. Climate control must be continuous and monitored.
Avoid direct sun on the crate. Ensure airflow without creating an escape route. Do not open doors or windows at roadside stops unless the dog is already secured inside the crate or controlled by two leads and a second handler.
The driver should also account for loading delays. A vehicle that is safe during motion may become unsafe during a ten-minute wait in direct sun. If the transfer site is delayed, contact the receiving team and move to a controlled, climate-appropriate location rather than improvising at the curb.
The NPOG protocol and safe loading procedures
Unvaccinated puppies require a stricter transfer sequence. The NPOG standard—No Paws On Ground—means the puppy remains crated and is carried between vehicles or indoor transfer points. Public sidewalks, parking lots, rest-area floors, and shelter entrances are potential exposure surfaces.
NPOG is not a suggestion to “be careful.” It changes the physical movement plan.
Use the loading sequence
Before the dog arrives at the vehicle:
1. Park in a position that limits foot traffic and keeps the vehicle level.
2. Close all unnecessary doors and windows.
3. Place the crate inside the vehicle and secure it before bringing the dog forward.
4. Prepare the harness, collar, standard leash, and slip lead.
5. Confirm the receiving driver or handler is present.
6. Check the paperwork against the dog’s identification.
7. Load the dog using two points of control.
8. Close and latch the crate before releasing either lead.
9. Confirm the dog’s position and the crate’s stability.
10. Send the required departure message.
For an unvaccinated puppy, the crate should be carried from the originating location to the receiving vehicle. Do not place the puppy on the ground for a “quick” leash adjustment or bathroom break. If the puppy must be moved between crates, use a controlled indoor surface or a clean, approved transfer procedure.
Apply double-leashing correctly
Assume every rescue dog is a flight risk during loading, unloading, and rest stops. Stress changes gait, attention, and force production. A dog that normally walks calmly can reverse out of equipment, rotate through a collar, or surge toward an open door.
Use two independent control points:
- A standard leash attached to a properly fitted harness or secure collar.
- A slip lead used as a second line of control.
The harness or collar must fit securely. Maintain no more than one finger width of space under a fitted collar or harness. The equipment must not impair breathing, gait, or shoulder movement. Never tether a dog by the collar inside a vehicle. If the dog is secured in the vehicle, the anchor point must be a secure harness, never a collar.
Double-leashing does not mean tying the two leads together. Each line must remain independently usable. Keep slack controlled. Do not wrap leads around hands, wrists, steering wheels, or vehicle hardware. A lead wrapped around a hand converts an escape event into a hand, shoulder, or fall injury.
A useful transfer rule is simple:
- The crate door opens only after both control lines are attached and held.
- One person opens the door.
- One person controls the dog.
- One person, if available, manages the vehicle and paperwork.
- The dog moves directly from one secure location to another.
- At least one control line remains attached until the dog is inside the closed crate or handed to the next responsible handler.
If only one handler is present, reduce the number of transitions. Do not carry paperwork, open doors, and control a frightened dog simultaneously. Stage the documents and equipment first.
Troubleshoot an equipment problem before movement
Stop the transfer if:
- The dog backs out of the harness.
- The collar or harness has more than one finger width of looseness.
- A leash clip does not close completely.
- The crate latch does not engage.
- The crate cannot be secured to the vehicle.
- The dog is showing escalating escape behavior.
- The receiving location is not ready.
- The identity on the paperwork does not match the dog.
The correct response is to close the crate or return the dog to the originating secure area. Do not solve a restraint problem while standing beside an open vehicle door.
Managing behavioral risks during transit and rest stops
A transport dog is operating under unfamiliar sensory and mechanical conditions. Road noise, vibration, braking, unfamiliar handlers, confinement, and changes in smell can produce defensive or escape behavior. Behavior is not a side issue. It determines the load on the handler, leash, crate, and vehicle.
Monitor gait and body position
Gait analysis is useful even in a basic volunteer transport. Observe whether the dog is standing, lying, circling, bracing, or repeatedly striking the crate. A sudden change in posture can indicate pain, nausea, overheating, anxiety, or equipment failure.
Record relevant observations rather than using vague labels. “Restless” is less useful than “repeatedly pawing at the crate door and panting despite climate control.” “Fine” is less useful than “lying in sternal position, responsive, drank water, urinated at stop.”
Watch for:
- Persistent panting unrelated to ambient temperature.
- Repeated attempts to escape the crate.
- Vomiting or diarrhea.
- Weakness, collapse, or abnormal responsiveness.
- Bleeding, limping, or visible injury.
- Distressed vocalization that does not reduce after the vehicle stabilizes.
- Excessive drooling or inability to settle.
- Crate damage or a displaced harness.
If a dog becomes medically unstable, contact the rescue coordinator and follow the organization’s veterinary emergency protocol. Do not continue the route simply to preserve the schedule.
Plan rest stops at four-hour intervals or sooner
For long-distance relay transports, stop at least once every four hours. The stop is an animal-welfare inspection, not an automatic release from confinement.
At the stop:
1. Select a controlled location away from heavy pedestrian traffic where possible.
2. Confirm the dog’s harness and collar fit before opening the vehicle.
3. Attach both the standard leash and slip lead.
4. Keep the crate door closed until both leads are secured.
5. Move the dog to an appropriate elimination area.
6. Offer water.
7. Check for urine, feces, vomiting, injury, overheating, or unusual behavior.
8. Clean the crate pan or replace contaminated bedding.
9. Return the dog to the crate before removing either control line.
10. Report elimination, drinking, and behavioral status in the transport group chat.
Adult dogs may be allowed to eliminate safely during these stops when the route and equipment support it. Unvaccinated puppies remain under NPOG protocols and should not place paws on public surfaces. A puppy that cannot safely touch the ground must be carried between secure locations.
Do not improvise a roadside exercise session. A rest stop should reduce risk, not add a new escape opportunity. Avoid opening the crate in an uncontrolled parking area, near traffic, or while the driver is alone and distracted.
Separate the welfare stop from the handoff
A rest stop and a transfer point have different risk profiles. At a rest stop, the driver controls the environment. At a handoff, another person, another vehicle, and another set of doors enter the sequence.
Before a handoff:
- Verify the identity of the receiving driver or handler.
- Confirm the destination and next relay segment.
- Review the dog’s current condition.
- Stage the receiving crate or secure vehicle area.
- Keep the dog under double-leash control.
- Exchange paperwork before releasing the dog where practical.
- Confirm the receiving person has physical control before the original handler releases a lead.
The most dangerous moment is often not the journey. It is the transition between systems.
Documentation requirements and communication chains
Paperwork prevents identity errors, treatment gaps, and failed handoffs. Every dog should travel with physical or digital documentation that can be accessed even if cell service is poor or a phone battery fails.
Carry the complete transport record
The driver should verify the assigned documents before departure. The record should include, as applicable:
- Shelter or owner release forms.
- Vaccination records.
- Veterinary health certificates.
- Dog identification and destination information.
- Medical restrictions or medication instructions.
- Emergency contact details.
- Relay schedule and transfer locations.
- Rescue organization instructions for delays or veterinary escalation.
Do not rely on a verbal description of the dog. Match the paperwork to the animal’s identification and confirm the destination before loading. A transport error can occur when two dogs have similar names, similar coloring, or adjacent relay assignments.
Digital documents are useful but fragile. Keep the phone charged and store critical information in an accessible format. If the organization provides printed records, carry them in a waterproof folder. Protect documents from contaminated surfaces during rest stops.
The driver is not expected to interpret veterinary records beyond the transport instructions. The operational requirement is to know what has been assigned, what must be communicated, and whom to contact when the record is incomplete.
Use milestone-based communication
A rescue transport should have defined volunteer pet transport milestones. These are not administrative niceties. They create a time-stamped chain of custody and allow the coordinator to identify a delay before it becomes a welfare problem.
At minimum, communicate:
1. Pre-departure confirmation — vehicle ready, equipment present, paperwork received, driver at the correct location.
2. Animal receipt — dog received, identity verified, physical condition noted.
3. Departure — dog secured, crate latched, route started.
4. Rest-stop update — water offered, elimination status, crate condition, behavior.
5. Delay or incident — location, cause, dog’s condition, action taken.
6. Arrival at transfer point — receiving person present and vehicle ready.
7. Handoff completion — dog transferred, documents delivered, next handler identified.
8. Final arrival — destination received the dog and records.
At transfer points, confirm arrival, receipt of the animal, elimination status—pee, poop, or neither—water intake, and behavioral status in the assigned group chat. The wording can be brief. It must be specific.
A useful update is:
“Received at 14:20. ID verified. Crated and secured. Drank at prior stop. Urinated, no stool. Calm, responsive. Arriving at next relay at approximately 16:00.”
This is operational data. It supports decisions by the next handler.
Every handoff should answer four questions: Which dog is this, who has control, what is the dog’s current condition, and what happens next.
Volunteer logistics and liability boundaries
Volunteer drivers often focus on the route and underestimate the logistical boundary around it. A transport assignment is not automatically a promise of reimbursement, vehicle coverage, or universal legal authority to cross state lines.
Do not assume the rescue organization will reimburse fuel, tolls, lodging, vehicle damage, or veterinary expenses. Many all-volunteer organizations do not reimburse travel expenses. Confirm the arrangement before accepting the route.
Likewise, do not assume that one national licensing standard applies to every unpaid driver or every interstate route. Requirements can vary by jurisdiction and by the type of transport. The rescue organization should define the approved route, required documents, and any state-specific conditions relevant to the assignment.
Before departure, resolve these points in writing or in the organization’s designated communication channel:
- Who owns the transport plan.
- Who may authorize a route change.
- Who pays approved expenses, if anyone.
- Who authorizes emergency veterinary care.
- Which number is monitored during the journey.
- What happens if the next driver is late or absent.
- Where the dog remains if the transfer fails.
- Which documents must remain with the dog.
- Whether personal pets are prohibited or conditionally permitted.
- Whether the vehicle and equipment meet the rescue’s standards.
A route should have a failure plan. If a driver cannot complete the segment, the dog must remain contained and supervised. Do not hand the dog to an unverified person because the scheduled relay is late. Contact the coordinator, keep the dog secured, and document the delay.
Assess the route as a sequence of risks
Break interstate pet rescue transport preparation into segments rather than treating the trip as one continuous drive. For each segment, identify:
- Starting location and loading conditions.
- Expected travel time.
- Approved rest-stop options.
- Weather and thermal-control concerns.
- Transfer location and receiving contact.
- Emergency veterinary access.
- Communication coverage.
- Backup plan for a failed handoff.
The route is only as strong as its least controlled segment. A well-prepared shelter departure does not compensate for an unconfirmed receiving driver at the final relay.
The complete shelter dog transport volunteer driver checklist
Use this sequence before accepting the dog, during transit, and at the final handoff.
Before loading
- Confirm the dog’s identity and destination.
- Obtain release forms, vaccination records, and veterinary health certificates.
- Review medical restrictions and emergency contacts.
- Inspect the crate, pan, latch, and attachment points.
- Secure the crate inside the vehicle.
- Prepare clean bedding and spare bedding.
- Prepare a standard leash, harness or collar, and slip lead.
- Confirm the harness or collar permits no more than one finger width of looseness.
- Remove loose cargo from the dog’s area.
- Confirm climate control and airflow.
- Separate personal pets from the transport area.
- Establish the next relay contact.
During loading
- Close unnecessary doors and windows.
- Attach both control lines before the dog approaches the vehicle.
- Use the crate for unvaccinated puppies under NPOG protocol.
- Keep one handler focused on the dog.
- Keep one handler focused on the crate and vehicle when staffing permits.
- Move the dog directly into the secured crate.
- Close and latch the crate before releasing either lead.
- Verify the dog’s position and the crate’s stability.
- Send the receipt and departure update.
During transit
- Monitor posture, breathing, temperature, and behavior.
- Stop at least once every four hours on long journeys.
- Offer water at controlled intervals and record intake.
- Check for urine, feces, vomiting, injury, or unusual behavior.
- Clean the crate pan and replace contaminated bedding.
- Use double-leashing for every release from the crate.
- Keep unvaccinated puppies off public ground.
- Report delays and incidents immediately.
- Do not continue through a medical emergency without following the rescue’s escalation protocol.
At handoff
- Verify the receiving person.
- Confirm the dog’s identity again.
- Stage the receiving crate or secure vehicle before opening the current crate.
- Attach and hold both control lines.
- Transfer the dog only when the next handler has physical control.
- Exchange the transport documents.
- Report condition, elimination status, water intake, and behavior.
- Confirm the next destination or final arrival.
- Disinfect the crate, pan, bedding-contact surfaces, and equipment before the next transport.
Shelter dog relocation safety steps are repetitive by design. Repetition removes decisions from the highest-risk moments. The objective is not a fast transfer. The objective is a controlled transfer with no escape, no preventable exposure, no lost documentation, and no silent welfare decline.
A volunteer driver is not merely moving an animal between points. The driver is maintaining containment, load distribution, thermal regulation, infection control, and chain-of-custody communication across a relay system. If any one of those systems is missing, the route is not ready.
Final parameters are strict:
- The dog remains contained while the vehicle is moving.
- The dog is double-leashed during loading, unloading, and rest stops.
- Unvaccinated puppies follow NPOG procedures.
- Collars and harnesses fit within the one-finger limit.
- Rest stops occur at least every four hours on long routes.
- Records travel with the dog.
- Every handoff is verified and reported.
- Equipment is disinfected between transports.
- Personal pets remain completely separated unless the rescue has approved the setup.
- No driver departs without a confirmed receiving plan.