Airline Dog Crate Training: A Step-by-Step Timeline
A dog that resists a travel crate on the ground will not adapt reliably during check-in, loading, or flight. Air transport removes control from the handler. Noise increases. Visual contact ends.
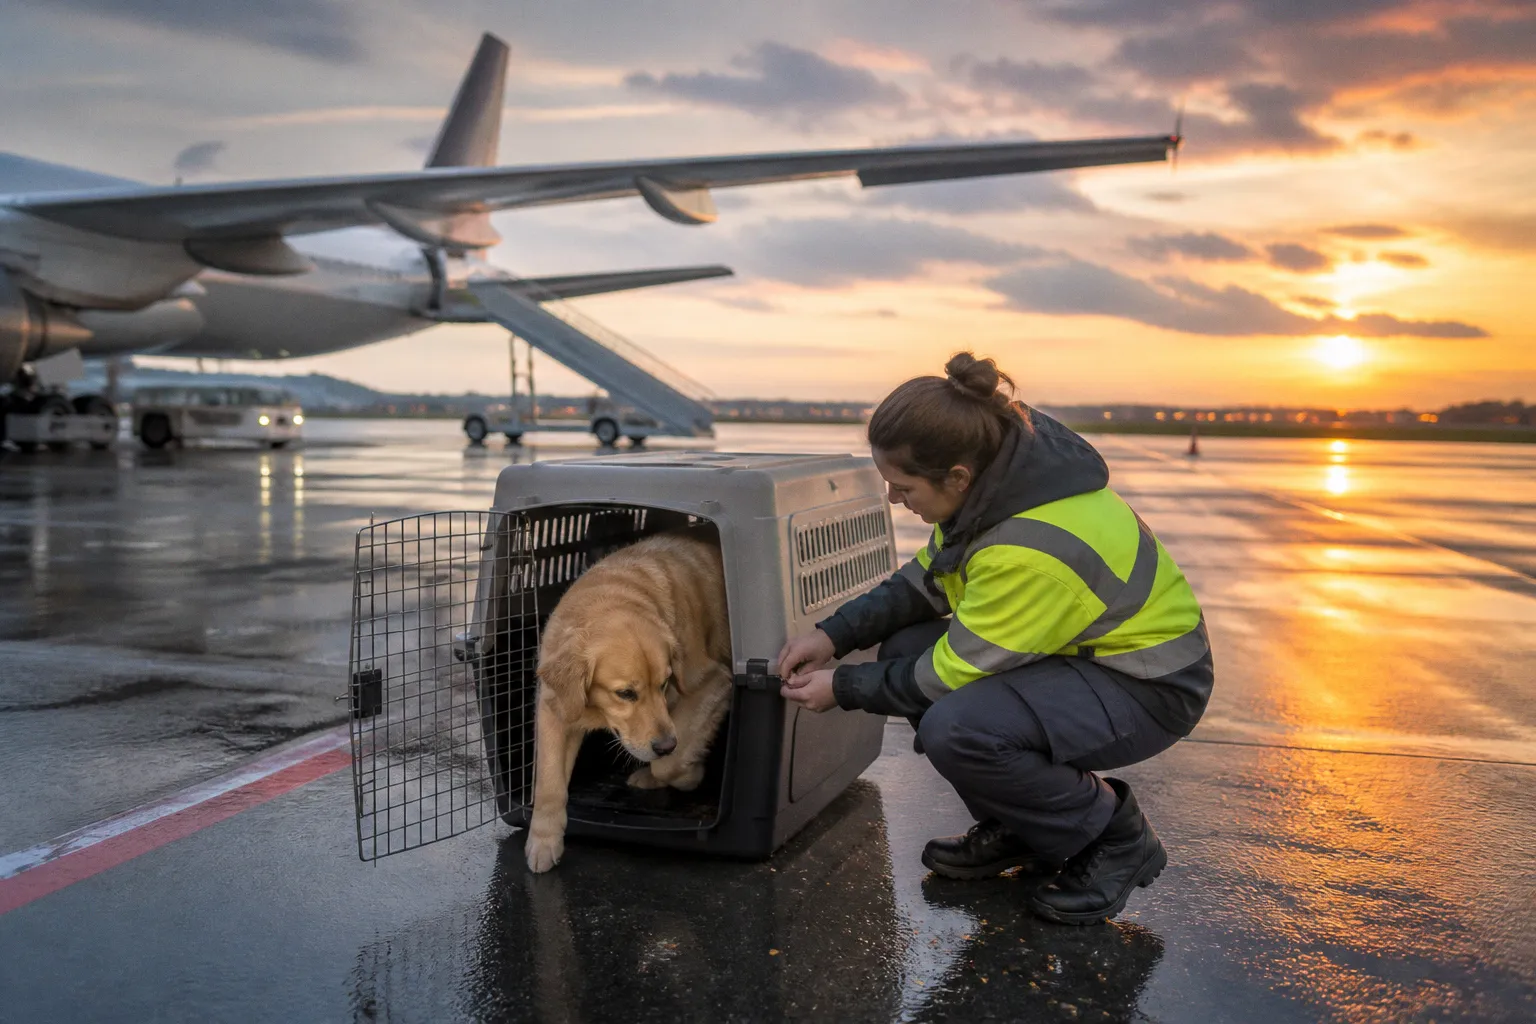
The crate becomes the dog’s only stable reference point.
A functional dog crate training timeline for flying starts at least 4–6 weeks before departure. Dogs with separation anxiety, confinement intolerance, or no prior carrier experience require approximately 12 weeks. The objective is not to force the dog to remain inside the crate. The objective is to establish a predictable behavioral response: enter, settle, rest, and remain stable while separated from the handler.
The training timeline has two components:
1. Mechanical compliance. The crate must meet the airline and IATA requirements.
2. Behavioral tolerance. The dog must remain below its stress threshold during confinement, separation, transport simulation, and environmental noise exposure.
Both are required. A compliant crate does not compensate for failed acclimation. A calm dog does not make a non-compliant crate acceptable.
The IATA Standard: Select the Crate Before Training Begins
Use the final flight crate from the first training session. Switching from a home crate to a different airline crate in the last week creates a new stimulus at the point when the dog should be consolidating behavior.
For international air transport, the crate should be rigid, non-collapsible, leakproof, and fitted with a solid floor. Standard collapsible wire crates are not approved for international air travel. A soft-sided carrier may be accepted for some in-cabin routes, but airline-specific rules vary. Do not treat an in-cabin carrier as interchangeable with a cargo crate.
Measure the dog in a standing position
The crate must allow the dog to:
- Stand naturally without touching the roof.
- Turn around fully without contacting the walls.
- Lie down in a normal resting position.
- Maintain approximately 3 inches of clearance above the head when standing.
- Adopt a stable posture without forced flexion of the neck or spine.
Measure the dog, not the breed standard. Coat volume, body condition, limb length, and spinal posture alter the required internal dimensions. A crate that technically fits the dog’s nose-to-tail length may still restrict turning or standing clearance.
Brachycephalic breeds require additional margin. A crate one size larger than the standard fit is recommended because respiratory mechanics can deteriorate when the dog is overheated, compressed, or forced into a restricted posture.
Inspect the hardware
The door should be metal and fitted with a secure locking system. The locking pins must extend at least 1.6 cm, or 5/8 inch, above and below the door opening. The lock should resist displacement from repeated pressure against the door.
The crate should also have:
- Ventilation on all four sides for international flights.
- Ventilation holes no larger than 1 inch, or 2.5 cm, for dogs.
- Total ventilated area equal to at least 16% of the surface area of the four sides.
- Spacer bars, or side and rear lips, that prevent adjacent cargo from blocking the ventilation openings.
- A solid, leakproof floor.
- Bowls attached to the inside of the door and refillable from the outside.
- Wheels removed, disabled, or taped before boarding.
Do not add loose objects to the crate without confirming airline policy. Toys, blankets with loose sections, and chew items can become obstruction or ingestion hazards. A thin absorbent layer secured to the floor may be useful, but it must not reduce traction or bunch under the dog’s limbs.
The crate is not a container to fill. It is a controlled mechanical environment for maintaining posture, ventilation, traction, and thermal regulation.
Match the crate to the transport method
Cargo transport exposes the dog to longer periods of confinement and less handler contact. Ground transport introduces vibration, vehicle movement, loading noise, and variable temperature. In-cabin travel has different carrier dimensions and airline restrictions.
The behavior transfer is not automatic. A dog trained in a small soft carrier may still panic in a rigid cargo crate. A dog that sleeps in a home wire crate may still react to the metal door, altered acoustics, or restricted visual field of an airline crate.
The Six-Week Progressive Training Schedule
The following schedule applies to a dog with no major confinement or separation disorder. Progress only when the dog can remain behaviorally stable at the current step. Calendar time is less important than response quality.
A stable response includes:
- Normal breathing for the environment.
- Ability to take food.
- Voluntary entry.
- Loose body posture.
- Recovery after the door closes.
- No persistent escape behavior.
- No repeated vocalization that escalates with time.
Panting, drooling, frantic scratching, repeated lunging, rigid posture, or refusal of normally valuable food indicate that the session is too difficult. Reduce duration or stimulus intensity. Do not increase pressure.
| Week | Primary objective | Training exposure | Advancement standard |
|---|---|---|---|
| 1 | Neutral crate introduction | Crate open in a quiet room; food and rest near the entrance | Dog approaches and enters without physical prompting |
| 2 | Positive association | Meals, treats, and calm rest inside the crate with the door open | Dog remains inside voluntarily for short periods |
| 3 | Door and duration tolerance | Close the door for brief intervals; increase duration gradually | Dog remains settled while the door is closed |
| 4 | Separation tolerance | Handler moves away, leaves the room, and returns without dramatic interaction | Dog maintains normal behavior during short absences |
| 5 | Transport simulation | Car rides, controlled vibration, unfamiliar sounds, and handling routines | Dog recovers quickly after movement and noise |
| 6 | Operational rehearsal | Full crate setup, feeding access, loading sequence, and extended rest periods | Dog completes the sequence without escalation |
Week 1: Introduce the crate as a neutral structure
Place the crate in a low-traffic area. Remove the door if possible, or secure it fully open so it cannot swing into the dog. Keep the crate away from forced entry points, loud appliances, and direct heat.
Do not place the dog inside. Do not block the exit. The first objective is voluntary investigation.
Use food delivery to shape proximity:
1. Place food several feet from the crate.
2. Move the food toward the entrance as the dog remains relaxed.
3. Place individual treats at the threshold.
4. Deliver food just inside the crate.
5. Allow the dog to enter and exit without interference.
6. Feed a portion of a meal inside only when the dog chooses to enter.
The dog should retain control over approach and withdrawal. If the dog takes food from the entrance but refuses to cross the threshold, return to the previous distance. This is a spatial tolerance problem, not disobedience.
Do not begin with extended confinement. Week 1 is about changing the crate’s predictive value. It should predict food, rest, and stable handling.
Week 2: Build duration without closing the door
Feed meals inside the crate. Keep the door open. Add a mat or absorbent liner that provides traction and does not slide under load. Observe gait when the dog enters and turns. Slippery flooring increases hesitation and changes load distribution through the limbs.
Begin reinforcing calm stationary behavior:
- Dog enters.
- Dog lies down or stands quietly.
- Handler delivers food at floor level.
- Dog exits when the reward sequence ends.
The reward should not require the dog to rush out. If the dog bolts from the crate immediately after each treat, reduce food excitement and deliver smaller pieces at longer intervals.
Increase internal duration in short increments. A dog that remains inside for 30 seconds with a loose posture is demonstrating more useful progress than a dog that remains inside for five minutes while scratching continuously.
Add low-intensity household activity. Walk past the crate. Sit several feet away. Move a chair. Open and close a nearby door. The dog must learn that normal environmental motion does not require immediate exit.
Week 3: Close the door in short intervals
Only begin door closure after the dog enters voluntarily and remains inside with the door open.
The initial door-closing interval may be 1–3 seconds. Open the door before stress appears. Repeat several times. Then increase the interval by small increments.
A practical progression may look like this:
1. Close and open the door immediately.
2. Hold it closed for 3 seconds.
3. Increase to 5–10 seconds.
4. Add 15–30 second intervals.
5. Introduce one- to two-minute rest periods.
6. Place the crate beside the handler during quiet work.
7. Add mild movement around the room.
Do not increase duration and environmental intensity in the same session. If the dog is learning to tolerate the closed door, keep the room quiet. If the dog is learning to tolerate household movement, shorten the confinement period.
Watch the kinetic chain. A dog under stress may shift weight repeatedly, brace the forelimbs against the door, or rotate the pelvis while trying to maintain visual contact. These are load and posture changes, not merely “bad behavior.” Repeated pushing against the door can cause nail damage, shoulder strain, and escalation of escape behavior.
Week 4: Train separation from the handler
Air transport requires separation tolerance. The handler will disappear from view. The dog must not depend on continuous eye contact to remain stable.
Begin with the handler seated beside the crate. Then use this sequence:
- Turn the body away for several seconds.
- Stand up and sit down.
- Take one step away.
- Walk to the opposite side of the room.
- Leave the room for 5–10 seconds.
- Extend the absence gradually.
- Vary the return interval so the dog does not anticipate a fixed release point.
Return quietly. Avoid prolonged greetings, verbal reassurance, or immediate release after vocalization. If the door opens every time the dog vocalizes, vocalization becomes an effective escape behavior.
This does not mean ignoring severe distress. If the dog is escalating, the session has exceeded tolerance. End the exposure safely, then reduce the next session’s duration or distance. Training must remain below the level at which panic dominates learning.
Dogs with separation anxiety often require more than six weeks. A 12-week preparation period is a more realistic minimum for dogs that cannot settle when the handler leaves, injure themselves against confinement, or show sustained distress despite gradual exposure.
A dog that is quiet because it has stopped moving is not necessarily calm. Assess posture, respiration, food response, and recovery time.
Week 5: Add controlled transport stimuli
The fifth week introduces movement and sound. Do not begin with an airport. Start with a controlled environment in which the dog can recover.
Use a vehicle only after the dog can rest in the closed crate at home. Secure the crate so it cannot slide, rotate, or strike the vehicle interior. Poor restraint creates unpredictable acceleration forces and changes the dog’s balance strategy.
Begin with:
1. Dog enters the crate.
2. Vehicle remains stationary.
3. Engine starts briefly.
4. Vehicle moves a short distance.
5. Stop and assess recovery.
6. Increase travel time only if the dog remains stable.
Monitor for motion-related signs: drooling, lip licking, repeated swallowing, vomiting, rigid bracing, vocalization, and inability to settle. These signs can reflect nausea, anxiety, or both. Discuss persistent symptoms with a veterinarian before increasing transport duration.
Add environmental sounds at low intensity. Use door movement, rolling equipment, distant voices, and vehicle loading sounds. Specific decibel targets are not established here, so use behavioral response rather than a fixed volume as the control parameter.
The dog should be able to recover after each exposure. Recovery means returning to normal breathing, accepting food, and resuming a resting posture within a reasonable period. If the dog remains activated after the vehicle stops, the next exposure should be shorter and quieter.
Troubleshooting the Training Response
Use the dog’s response to determine the next step. Do not follow the calendar when the behavior indicates a regression.
If the dog refuses to enter
Check the physical entry first. The threshold may be unstable. The interior may be too dark, too warm, or associated with previous forced confinement. Confirm that the crate is large enough for normal entry and turning.
Then remove pressure:
- Return food delivery to the outside of the crate.
- Place rewards at the threshold.
- Allow immediate exit.
- Avoid reaching inside.
- Do not push the dog’s hindquarters through the doorway.
- Use shorter sessions.
If the dog enters only when food is thrown deep inside, move the reward closer to the threshold. The goal is voluntary entry, not pursuit of a treat into a confined space.
If the dog enters but will not lie down
Assess the floor. A hard or slippery surface changes paw loading and reduces stability. Check for protruding hardware, uneven panels, or a liner that folds under the dog.
Assess crate dimensions. The dog may be able to stand and turn but lack sufficient room to lower the body without contacting the sides. This is especially relevant for long-backed or broad-chested dogs.
Do not force a down position. Increase quiet duration while the dog stands, then reinforce weight shifting, sitting, and eventual resting behavior.
If the dog scratches or bites the door
Stop increasing duration. Repeated escape attempts are a high-risk behavior. The dog may damage nails, teeth, gums, or the nose. It may also learn that the door is an opponent.
Return to an open-door exercise. Then close the door for a duration that ends before scratching begins. Use smaller increments. Increase distance from the crate only after the dog can tolerate the closed door.
A metal door and secure locking system are required for air transport, but hardware strength is not a substitute for behavioral preparation. A strong crate can contain a distressed dog while allowing injury to continue.
If the dog vocalizes when the handler leaves
Reduce the separation distance and duration. The correct exposure may be one step away for two seconds. Repeat until the dog can remain stable. Then add time or distance, not both.
Do not use verbal reassurance as a primary intervention. Repeated speech can increase arousal and reinforce attention-seeking patterns. Use predictable movement, neutral returns, and controlled release criteria.
If distress escalates rapidly, consult a veterinary behavior professional. Severe separation anxiety is not a basic crate-training problem. It can require a broader behavior plan and medical assessment.
If the dog becomes distressed during car travel
Separate motion intolerance from confinement intolerance. Test the dog in the stationary vehicle with the crate door closed. Then compare the response when the engine is running. Then test a short movement interval.
If signs appear only during motion, discuss travel-related nausea with a veterinarian. If signs appear before the vehicle moves, the primary issue may be anticipatory anxiety or a learned association.
Do not use an airline flight as the first extended transport exposure. Air travel combines confinement, vibration, temperature variation, unfamiliar handling, and separation. Training must isolate variables before combining them.
Simulating Airport and Cargo Conditions
The purpose of simulation is not to create maximum stress. It is to expose the dog to relevant stimuli while preserving control over intensity and duration.
Include the following elements across multiple sessions:
- Crate movement over smooth and uneven surfaces.
- Brief lifting and lowering by trained handlers.
- Vehicle loading and unloading.
- Door sounds and metal contact.
- Short periods without visual access to the handler.
- Rest in a low-traffic area.
- Feeding through the attached door bowl.
- Water access without opening the crate.
- Handling of identification documents and equipment near the crate.
Use two-person handling for a large crate. One person stabilizes the crate while the other controls the door or lifting point. Avoid tilting the crate. Sudden angular changes alter the dog’s center of mass and can produce slips or limb collisions.
Do not place the crate in direct sun during practice. Thermal regulation is part of transport safety. A dog can appear behaviorally quiet while developing heat stress. Monitor respiratory rate, gum color, drooling, posture, and recovery. Brachycephalic dogs require a lower thermal and respiratory risk threshold.
Avoid recreating airport noise at uncontrolled volume. The relevant training target is functional recovery, not endurance under acoustic overload. If the dog stops eating, presses against the wall, or shows persistent panting, reduce the stimulus.
Practice the operational sequence
During the final two weeks, run the sequence in the order expected on travel day:
1. Pre-travel elimination and normal hydration routine.
2. Dog enters the crate voluntarily.
3. Door closes and locks.
4. Bowls are checked from the outside.
5. Crate is moved without tilting.
6. Handler leaves the dog’s visual field.
7. Dog remains confined for a planned interval.
8. Crate returns to a quiet area.
9. Dog exits only after the handler confirms a stable posture and safe surroundings.
Keep the sequence neutral. Do not create a dramatic departure ritual. The dog should receive the same handling pattern used during training.
Preparing the Crate for the Flight
The final setup must preserve the dimensions and functions established during training. Do not add new bedding, restraints, toys, or equipment on departure day unless the dog has already used them successfully.
Confirm the following:
- The crate is rigid and non-collapsible.
- The internal dimensions permit standing, turning, and normal rest.
- The dog has at least approximately 3 inches of head clearance while standing.
- Ventilation is present on all four sides where required for international travel.
- Ventilation holes do not exceed 1 inch, or 2.5 cm.
- Ventilated area meets the 16% requirement across the four sides.
- The metal door closes securely.
- Locking pins extend at least 1.6 cm, or 5/8 inch, above and below the door opening.
- Spacer bars prevent cargo from blocking ventilation.
- The floor is solid, leakproof, and non-slip.
- Bowls are attached to the inside of the door.
- Bowls can be refilled from outside the crate.
- Wheels are removed, disabled, or taped.
- Identification details are attached according to the airline’s instructions.
- The dog has completed the same door, movement, separation, and rest sequence during training.
Airline acceptance is not determined by crate appearance alone. Carriers may apply additional requirements for dimensions, materials, brachycephalic breeds, route restrictions, seasonal temperatures, and cargo handling. Confirm the operating airline’s current rules before purchase and again before departure. A crate that matches a general IATA specification may still be rejected under a carrier-specific policy.
The Final Seven-Day Reduction in Training Load
The last week should not be a test of maximum endurance. Reduce novelty. Maintain short, successful sessions. The dog should enter the crate, settle, and exit without accumulating stress.
Use the final days to confirm:
- Normal eating inside the crate.
- Normal water intake.
- Normal elimination pattern.
- Stable gait after confinement.
- No new pressure points or abrasions.
- No regression when the handler leaves.
- Recovery after a short vehicle ride.
- Tolerance of the final crate hardware and bowl configuration.
Avoid marathon sessions designed to prove that the dog can remain confined for the full flight duration. Extended confinement without a clear training purpose can increase fatigue and stress. The objective is reliable regulation, not a single endurance record.
Do not introduce sedatives or other medication without veterinary direction. Changes in balance, respiration, thermoregulation, and arousal can alter transport risk. A medication plan, if medically indicated, must be evaluated before travel and not improvised at the airport.
Final Release Criteria
The dog is ready to progress to airline travel only when the following parameters are met:
- Voluntary crate entry occurs without physical placement.
- The dog can remain inside with the door closed and maintain a stable posture.
- The dog can rest without persistent scratching, biting, or repeated lunging.
- The dog accepts food or water during appropriate training sessions.
- The dog tolerates handler separation without escalating vocalization or escape behavior.
- The dog recovers after vehicle movement and environmental noise.
- The dog exits without gait abnormality, acute distress, or prolonged disorientation.
- The crate meets the required dimensions, ventilation, locking, floor, bowl, and wheel criteria.
- The airline has accepted the transport arrangement under its current rules.
If any parameter fails, stop the progression and identify the failed variable. Shorten the duration. Reduce the noise. Decrease separation distance. Correct the crate fit. Replace unstable flooring. Seek veterinary or behavioral support when the response exceeds normal training difficulty.
A dog crate training timeline for flying is a risk-control process. Four to six weeks may be sufficient for a dog with prior crate experience and stable separation behavior. Three months is more realistic when the dog has anxiety, confinement history, or no transport exposure. The final decision should be based on observable posture, respiration, gait, recovery, and hardware compliance.
The flight begins before the airport. It begins when the dog can enter the correct crate, maintain normal biomechanics inside it, and remain regulated while the handler is no longer present.